
If you’ve ever felt lost on an exchange page—too many buttons, too many charts—you’re not alone. Using the CoinEx web interface effectively can make the difference between guesswork and confident execution. This practical walkthrough focuses on real-world actions, from securing your account to placing efficient orders, decoding charts, and tracking results. Whether you’re new to CoinEx or want a sharper workflow, these steps help you trade faster and safer without missing key details.
- 20% fee cashback
- $8,000 bonus
- 20% fee cashback
- $60,000 futures bonus
- 20% trading fee discount
- $100 signup bonus
- $10,000 futures bonus
- 50% trading fee discount
- 20% fee cashback
- $6,200 futures bonus
- 20% fee cashback
- $10,000 bonus
- 20% trading fee discount
- $30,050 signup bonus
- Bonus pack worth $100–$1,500 USDT
- Fee discount
Quick start: New to the platform? Create your account via this referral link to support the guide and apply the code automatically: Sign up at CoinEx with referral code mhz7w.
Why the Web Interface Matters
- Speed and clarity: The browser interface offers a larger canvas for charts, order books, and positions, helping you spot trends and place orders quickly.
- Tool density: Advanced charting, depth, trade history, and risk tools appear side by side. Mastering layout means fewer misclicks.
- Universal access: Any modern browser on desktop or laptop gives you the same interface; bookmarks and saved layouts streamline repeat tasks.
The core idea is simple: make every click count. Using the CoinEx Web Interface Effectively means you reduce friction while increasing information quality at each step.
Step 1 — Account Setup and Security Hardening
Start on the registration page and lock down your account before depositing funds.
1) Register with referral support
– Use the official link: CoinEx registration — code mhz7w.
– Choose a strong, unique password (use a password manager).
2) Enable layered defenses
– Two-Factor Authentication (2FA): Add app-based 2FA (e.g., an authenticator app). Store backup codes securely.
– Anti-phishing code: Set a custom phrase so official CoinEx emails always include your secret line.
– Withdrawal whitelist: Allow withdrawals only to pre-approved addresses.
– Device and login alerts: Turn on email or SMS alerts for unknown logins.
3) Identity and access hygiene
– Complete identity checks if your region or features require it.
– Review active sessions and log out of those you don’t recognize.
– Avoid browser autofill for seed phrases or private keys (never enter wallet seeds on any exchange page).
Pro tip: Add CoinEx to your browser bookmarks and use it only from the official domain. Phishing pages often mimic login screens; verify the URL every time.
Step 2 — Understand the Layout at a Glance
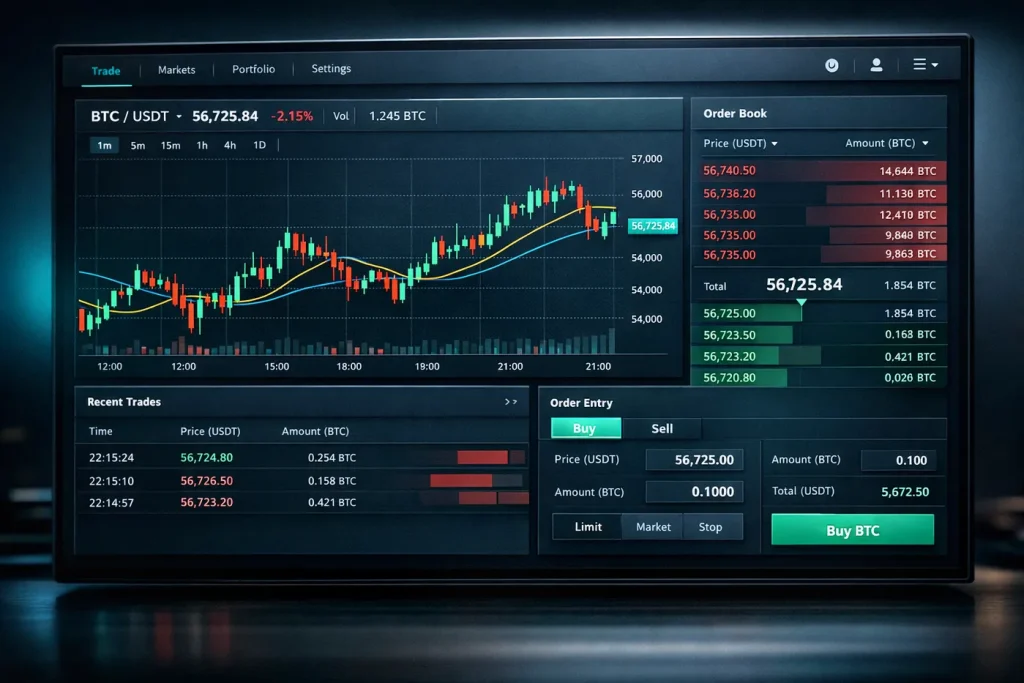
The main trading page typically includes:
– Markets panel: Search pairs (e.g., BTC/USDT). Favorite pairs with the star icon for quick access.
– Price chart (K-line/candlesticks): Select timeframes, overlays (MA/EMA), and indicators (RSI, MACD, volume).
– Order book and market trades: Get real-time depth and recent deals to gauge momentum and liquidity.
– Order panel: Choose order type, set price/size, and confirm orders.
– Positions/Orders tabs: Monitor open orders, filled trades, and trading history.
Efficiency tip: Reorder panels if the interface allows, and toggle full-screen charting when analyzing longer timeframes.
Step 3 — Deposits, Transfers, and Networks
- Depositing: Select the asset, choose the correct network, and copy the address carefully. Some networks require a memo/tag—never skip it.
- Withdrawing: Double-check network compatibility between sending and receiving wallets. Small test withdrawals help avoid costly mistakes.
- Internal transfers: Move balances between Spot and Futures (or other internal accounts) before you trade. Verify which wallet funds are in.
Network wisdom: If fees spike on one chain, consider alternate supported networks for the same token. Always confirm your destination wallet accepts that network.
Step 4 — Core Trading Actions in Spot Markets
Using the CoinEx web interface effectively starts with mastering order types:
- Limit order: Set your own price. Best for planning entries and minimizing slippage.
- Market order: Executes immediately at current best available price. Useful during breakouts but watch for slippage on low-liquidity pairs.
- Stop-limit and stop-market: Triggered at your stop price. Use for risk control or breakout entries.
How to place a basic trade
1) Pick your pair (e.g., ETH/USDT).
2) Set the order type.
3) Define quantity and price (for limit) or amount (for market).
4) Verify total cost, fee estimate, and balance.
5) Submit and confirm.
Depth reading basics
– Tight spreads and thick order books usually mean lower slippage.
– Watch for large resting orders that may absorb price moves.
– Compare recent trades with order book shifts to detect momentum.
Chart fluency
– Start with daily or 4H to identify trend. Zoom to 15m or 5m for entries.
– Use moving averages for structure and RSI/MACD for momentum context.
– Mark support/resistance zones directly on the chart.
Step 5 — Perpetual Futures and Risk Controls
Perpetual contracts add leverage and complexity. If you use them, keep risk top of mind.
- Margin modes: Choose Cross to share margin across positions or Isolated to ring-fence risk per position. Beginners often prefer Isolated.
- Leverage: Start low. Higher leverage magnifies both profits and losses.
- Funding rates: Perpetuals use funding to anchor price to spot. Funding payments occur at intervals; check the timer and rate.
- Liquidation buffer: Monitor margin ratio and add collateral or reduce size if risk rises.
Workflow for a futures trade
1) Transfer funds from Spot to Futures.
2) Select Cross or Isolated, then set leverage conservatively.
3) Plan entries and exits on higher timeframes first.
4) Use stop-market for hard risk limits; avoid moving stops without strong justification.
5) Track PnL, margin ratio, and funding before stepping away from the screen.
Step 6 — Fees, VIP Tiers, and CET Deductions
- Maker vs. taker: Limit orders that rest in the book are usually maker; market orders are taker. Fees differ by category.
- VIP tiers: Higher 30-day volumes can unlock lower fee tiers; check the fee schedule inside the interface.
- CET fee deduction: If available, enabling CET deduction can reduce fees. Verify your settings and the current discount rate.
Action tip: Before executing large orders, estimate your fee impact and consider partial limit entries to qualify for maker rates where appropriate.
Step 7 — Portfolio, History, and P&L Tracking
- Balances and allocations: View total account value and asset distribution. Favorite or hide small balances to declutter.
- Order and trade history: Filter by market and date to review execution quality.
- Realized/unrealized PnL: Distinguish between closed trade performance and active risk.
- Exports: Generate CSV exports for tax and analytics tools.
Routines that help
– Weekly review: Which setups worked? Which timeframes performed best?
– Slippage log: Note differences between expected and actual fills on market orders.
– Fee audit: Cross-check fee totals monthly; small optimizations compound.
Step 8 — Customizing the Interface for Speed
- Favorites bar: Star your top 10 pairs to cut search time.
- Chart templates: Save indicator sets (e.g., EMA 20/50, RSI 14) and reuse across pairs.
- Theme and density: Pick light/dark themes and adjust layout density for your screen size.
- Notifications: If browser notifications are supported, enable fills and order status updates.
Browser-side boosts
– Create separate profiles for trading to isolate extensions and cookies.
– Use a widescreen layout or dual monitors to keep charts and orders visible.
– Keep a dedicated notes app open for trade plans.
Step 9 — API Keys and Automation Awareness
Even if you trade manually, understanding API keys helps you scale later.
- API key creation: In your account settings, create read-only keys for portfolio tracking apps.
- Permissions: For trading bots, enable only the permissions required; avoid withdrawal permissions unless absolutely necessary.
- IP whitelisting: Restrict API usage to trusted IPs if available.
- Rotation: Rotate keys periodically and revoke unused ones.
Note: Start with paper or tiny allocations when testing any automation.
Step 10 — Common Pitfalls and Quick Fixes
- Wrong network on deposit/withdrawal: Always match chain and confirm tags/memos. Test with a small amount first.
- Placing the wrong order type: When in doubt, use limit orders with clearly defined prices; double-check buy/sell direction.
- Over-leveraging: Use Isolated mode and small leverage until your approach is proven over dozens of trades.
- Ignoring fees: Maker/taker differences add up. Use the fee schedule to plan execution.
- Chart overload: Limit yourself to 1–3 indicators and keep annotations clean.
A Practical Workflow You Can Reuse
1) Prepare the account
– Log in from your bookmark. Confirm 2FA is active.
– Glance at system notifications, maintenance, or announcements.
2) Market scan
– Open your watchlist and sort by volume change.
– Check daily and 4H trends, then drop to 1H/15m for timing.
3) Trade planning
– Define entry, stop-loss, and take-profit on the chart first.
– Estimate position size based on max risk per trade (e.g., 0.5–1% of account).
– Choose limit for planned entries; use stop-market for protection.
4) Execution checklist
– Verify pair and direction (long/short or buy/sell).
– Confirm order type, size, and stop placement.
– Submit and wait for confirmation; avoid editing impulsively.
5) Review and record
– Snapshot the chart and note reasons for entry.
– After fill, set alerts or conditional exits as needed.
– At session end, review fills, fees, and PnL.
Extra Tips for Using the CoinEx Web Interface Effectively
- Liquidity clusters: Use order book heat to find likely bounce or stall zones.
- Session timing: Volatility often clusters around session opens and major news releases; plan liquidity accordingly.
- Capital rotation: When majors stall, check second-tier pairs with rising volume, but confirm spreads first.
- Stablecoin pairs: If moving large size, consider deeper markets first to minimize slippage.
- Maintenance windows: Avoid placing critical orders during scheduled updates.
Getting Started Today
- Register now with this referral-backed link to get going: Create your CoinEx account with code mhz7w.
- Set up 2FA, anti-phishing, and withdrawal whitelist before any deposit.
- Favor limit orders until your fills match expectations.
- Track PnL weekly and iterate using data, not hunches.
For most traders, the breakthrough isn’t a secret indicator—it’s mastering the basics of navigation, execution, and risk. With a secure setup, a clean layout, and disciplined order flow, you’ll feel the difference in both speed and confidence when using the CoinEx web interface effectively.
Related posts:
 Essential Guide — What is the RCADE (RCADE) Coin, and how to buy
 Bybit Copy Trading Platform Review Proven Insights from Hands‑On Use
 Actionable Bitget Wallet Guide for Beginners Step-by-Step Setup Security and First Trade
 What is a Rug Pull in Crypto? Essential Answers, Red Flags, and Proven Prevention Tactics