
Smart risk management is the difference between a trade that survives a spike and one that evaporates in a wick. If you’ve ever asked yourself how to set TP/SL on Bybit Futures without getting slipped, closed out unexpectedly, or missing profits, this guide walks you through the exact steps on both desktop and mobile—plus advanced options like hedge mode, trailing stops, and multi‑target take profits.
Quick note for new traders: you can sign up or switch accounts with the referral code CRYPTONEWER and get started on Bybit.
Why TP/SL on Bybit Futures matters more than you think
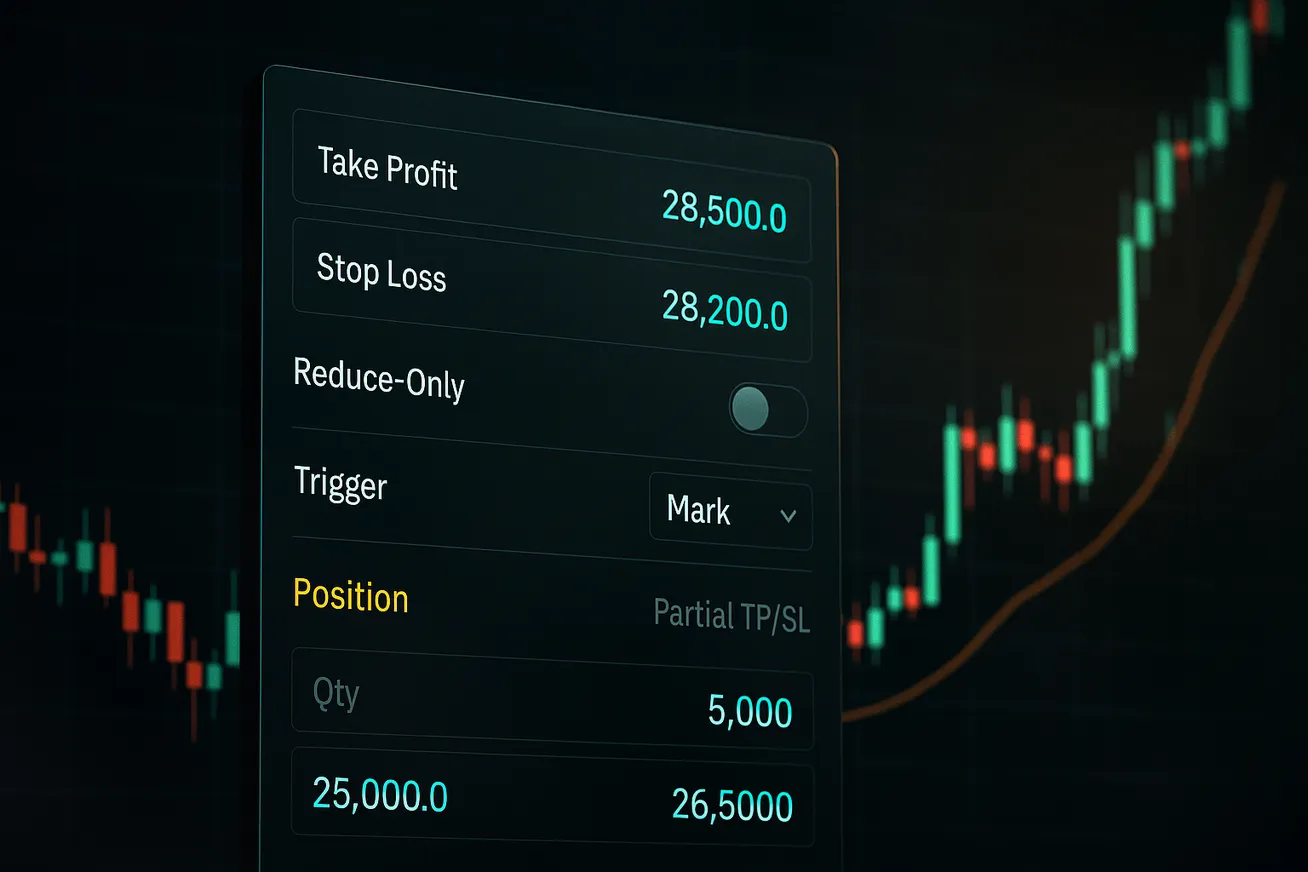
- Take Profit (TP): A preset price to close your position in profit.
- Stop Loss (SL): A protective price to limit loss and prevent liquidation.
On Bybit Futures, these aren’t just safety nets. They’re execution instructions that define how your trade exits under stress. When you combine TP/SL with “reduce-only,” trigger source selection, and proper sizing, you turn random outcomes into defined risk.
Before you start configure your trading environment
- Margin mode: Choose Isolated for contained risk per position or Cross if you want margin shared across positions. Beginners typically prefer Isolated.
- Leverage: Higher leverage narrows your liquidation buffer. Your stop loss should live comfortably above liquidation (for shorts) or below it (for longs).
- Position mode:
- One-Way Mode: One net position per symbol. TP/SL applies to that single direction.
- Hedge Mode: Hold simultaneous long and short positions in the same symbol. TP/SL must be set per side.
- Trigger source: Decide whether your stops trigger on Mark Price (recommended for fairness and less wick sensitivity) or Last Price (matches the latest traded price; can be wickier).
The fast answer how to set TP/SL on Bybit Futures in three ways
1) Use a bracket order before entry
– In the order panel, choose Limit or Market.
– Set your order quantity.
– Toggle or open the TP/SL section.
– Input Take Profit and Stop Loss prices (or percentages).
– Optional: Select trigger via Mark or Last price if available in your panel.
– Place the order. When filled, your TP and SL become active.
2) Add TP/SL to an open position
– Go to Positions.
– Find your symbol and click TP/SL (or the pencil/edit icon).
– Enter TP and SL prices or set by percentage from entry.
– Confirm. Your exits are now attached to the position.
3) Use conditional orders for precision
– Choose Conditional in the order tab.
– Input a trigger price, then set execution as Market or Limit.
– Mark reduce-only if you want this order to close—not flip—your position.
– This is useful for complex entries and exits beyond simple brackets.
Pro tip: Always mark “reduce-only” for TP/SL and partial targets so you don’t accidentally open a reverse position.
Desktop walkthrough step by step
1) Place a bracket with TP/SL at entry
– Pick your contract (e.g., BTCUSDT Perpetual). Choose Market or Limit.
– Set quantity. On Bybit, you can size by contracts or by cost depending on the instrument.
– Click TP/SL. Enter your Take Profit and Stop Loss. Some panels allow price or percentage inputs.
– Choose your trigger source (Mark vs Last). Mark Price helps avoid stop hunts; Last Price matches the printed trade.
– Optional: Post-Only (for Limit makers), Time-in-Force (GTC, IOC, FOK), and Reduce-Only for closing orders.
– Submit. Your position opens with attached protection.
2) Add TP/SL after your trade is live
– Positions tab > locate the trade.
– Click TP/SL to edit. Enter exact TP and SL values.
– Confirm. You can modify later without closing the trade.
3) Partial take profits multi-target laddering
– Bybit allows a single TP in the basic field, but you can create multiple reduce-only Limit orders at different targets.
– Example: You’re long 1.5 BTC.
– Target 1: 0.5 BTC at 1% above entry
– Target 2: 0.5 BTC at 2% above entry
– Target 3: 0.5 BTC at 3% above entry
– Each limit order must be reduce-only and GTC. Your SL can remain as one stop for the remainder or you can trail it higher after partial fills.
4) Trailing stop on desktop
– In your position panel, look for Trailing Stop.
– Set Activation Price (optional) and Callback Rate (percentage). Example: Activation 30,000; Callback 0.5%.
– When price moves in your favor and pulls back by the callback rate, the trailing stop fires as a market order (or as designed in your settings).
5) Stop Market vs Stop Limit
– Stop Market: Most reliable protection. When triggered, it closes at market. Best for SLs.
– Stop Limit: Offers price control but may not fill in fast moves (gap risk). If you use Stop Limit for SL, set a limit offset wide enough to ensure a fill.
6) Index and mark considerations
– For fairness and avoiding wick stops, Mark Price trigger is often preferred for SL.
– For precise profit-taking aligned to prints, Last Price on TP can be fine.
Mobile app walkthrough quick and clear
1) Open the Bybit app and go to Derivatives > Perpetual or Futures contract.
2) Choose One-Way or Hedge Mode in Settings if needed.
3) Tap Buy/Long or Sell/Short panel. Set your order (Market or Limit) and quantity.
4) Tap TP/SL. Enter TP and SL as price or percentage. Choose trigger source if available.
5) Place the order. After fill, your exits are active. To edit, open Positions > tap the position > TP/SL.
6) For partial take profits, place additional Close Limit orders with reduce-only toggled at your target prices.
7) For a trailing stop, open the position details and configure Activation and Callback on mobile.
Hedge Mode specifics setting TP/SL for long and short independently
In Hedge Mode, you can hold both long and short concurrently. Each side has its own TP/SL.
– Open Long: Attach a protective SL below and TPs above.
– Open Short: Attach SL above and TPs below.
– When editing, ensure you’re modifying the correct side’s TP/SL. The app and desktop display separate entries labeled Long and Short.
Why use Hedge Mode?
– Strategy overlays (e.g., a long-term swing long plus a short-term scalp short).
– Event hedges during high-volatility news.
Risk note: Hedge Mode requires careful margin monitoring. Stops can cascade during fast markets if margin is thin.
Advanced trade construction examples
1) Breakout bracket example
– Setup: BTCUSDT breaks a multi-day range. You want a clean entry with defined risk.
– Order: Market Buy 1 BTC.
– TP: +2.5% from entry.
– SL: -1.2% from entry, Stop Market, Mark Price trigger, Reduce-Only.
– Optional: Trailing stop after price moves 1.5% in your favor with 0.4% callback.
2) Range scalp with partials
– Setup: ETHUSDT ranges between local support and resistance.
– Entry: Limit Buy at support, Post-Only to avoid taker fee.
– TP1: 40% size near mid-range; TP2: 40% at resistance; leave 20% runner.
– SL: Tight stop 0.6% below support using Mark trigger.
– Management: After TP1 fills, move SL to break-even.
3) Swing short with stop limit nuance
– Setup: Lower high confirms downtrend; you prefer controlled SL slippage.
– Entry: Limit Sell on retest.
– SL: Stop Limit with trigger above prior swing high and limit slightly worse (e.g., trigger 2,500; limit 2,510) to increase fill chance.
– TP: Staggered bids at key fib levels, all reduce-only.
Practical risk math for Bybit Futures
A simple position sizing approach by risk amount and stop distance:
– Account risk per trade: 1% of equity (example).
– Stop distance: If your long entry is 30,000 and SL is 29,700, your stop distance is 300.
– Risk budget: On a 10,000 USDT account, 1% risk = 100 USDT.
– Position size: 100 USDT risk / 300 stop distance ≈ 0.333 contracts per 1 USDT tick value. For USDT perpetuals where 1 contract = 1 USDT notional, adapt to the instrument’s tick and multiplier.
– Use Bybit’s order panel calculator to confirm exact contract sizing, then round down to avoid overexposure.
R-multiples keep you consistent. If you target 2R (twice your risk), a 100 USDT risk aims for 200 USDT profit. Combine with partial take profits to realize gains while letting a runner seek 3R or more.
Common mistakes when setting TP/SL on Bybit and how to avoid them
- Forgetting reduce-only on TPs: Without it, TP fills can flip your position. Always toggle reduce-only for exits.
- Misusing trigger source: Last Price triggers can fire on wicks. If you keep getting wicked out, try Mark Price for your SL.
- Stop Limit too tight: If the limit is too close to the trigger, it may not fill during fast moves. Consider Stop Market for critical protection.
- No TP and SL on initial order: Volatility can move faster than you can react. Use brackets from the start.
- Cross margin without plan: Liquidations can cascade across positions. Prefer Isolated unless you intentionally want cross exposure.
- Hedge Mode confusion: Setting TP/SL on the wrong side. Double-check Long vs Short labels before confirming.
- Partial fills and edits: If your position fills partially, your TP/SL sizes should reflect the filled quantity. Re-check after fills.
How to Set TP/SL on Bybit Futures FAQ
Q: Can I set multiple take profits natively?
A: The basic TP field is single. To run multiple targets, place additional reduce-only Limit orders at each target level. They’ll scale you out as price hits them.
Q: Should I use Mark Price or Last Price for my stop loss?
A: Mark Price is generally more stable and less prone to wick-triggering. Last Price matches actual trades but can be noisier. Many traders prefer Mark for SL and Last for TP.
Q: What’s the safest stop type?
A: Stop Market is the most reliable for getting you out. Stop Limit gives better control but risks no-fill during spikes.
Q: How do I move a stop to break-even automatically?
A: Manually edit your SL once price has advanced, or use a trailing stop after a certain activation level. Some traders also set a conditional reduce-only Stop Market at entry once TP1 hits.
Q: Does “Close On Trigger” matter?
A: Close On Trigger plus Reduce-Only ensures the order will only close existing positions and not open new ones. It’s helpful during volatile periods.
Q: How do I set TP/SL on the Bybit app quickly?
A: When creating the order, tap TP/SL, input price or percentage, choose trigger source, and place. To modify, go to Positions > select the trade > TP/SL.
A tight operational checklist you can reuse
-
Before entry
- Decide your risk per trade (e.g., 0.5%–1%).
- Mark price levels for entry, TP, SL.
- Choose trigger source: Mark (safer for SL) or Last.
- Set order type: Market for certainty, Limit for precision.
- Add TP/SL in the bracket, enable reduce-only for exits.
-
After filled
- Verify TP/SL in Positions—check prices, sizes, and reduce-only.
- If using partial TPs, place laddered reduce-only limits.
- Consider adding a trailing stop or move SL to break-even after TP1.
-
Ongoing
- Recalculate risk if you add to the position.
- Avoid canceling your SL. If you move it, move it based on structure, not emotion.
Get started and lock in better trade management
If you haven’t set up Bybit yet, join with the referral code CRYPTONEWER on Bybit. Once inside, practice bracket orders with small size. Add partial TPs via reduce-only limits. Try a trailing stop to protect profits without hand-holding. Over a few sessions, you’ll find a TP/SL routine that fits your strategy—and protects you during volatility.
Disclaimer: This article is for educational purposes only and not financial advice. Futures involve risk; never trade money you cannot afford to lose.
 Blockchain for Environmental Sustainability Proven Strategies for Measurable Climate Impact
 Ultimate Guide to Binance Airdrop: Maximize Your Crypto Earnings (June 2024)
 CoinEx VIP Program Explained: Unlock Powerful Benefits on Your Favorite Crypto Exchange
 How to Use Copy Trading on Bitget: Complete Guide for Beginners