Transferring crypto shouldn’t be confusing or nerve-racking. If you’re learning How to Transfer Funds in MEXC Wallet, this no-nonsense, step-by-step walkthrough shows you exactly how to move assets inside MEXC (Spot, Futures, Margin, and Funding accounts) and on-chain to or from external wallets. You’ll also get pro tips to minimize fees, avoid network mistakes, and keep your funds secure.
Ready to start or switch to an exchange with versatile funding options? Sign up for MEXC and support this guide using the referral code mexc-CRYPTONEWER via this promo link: Join MEXC with code mexc-CRYPTONEWER.
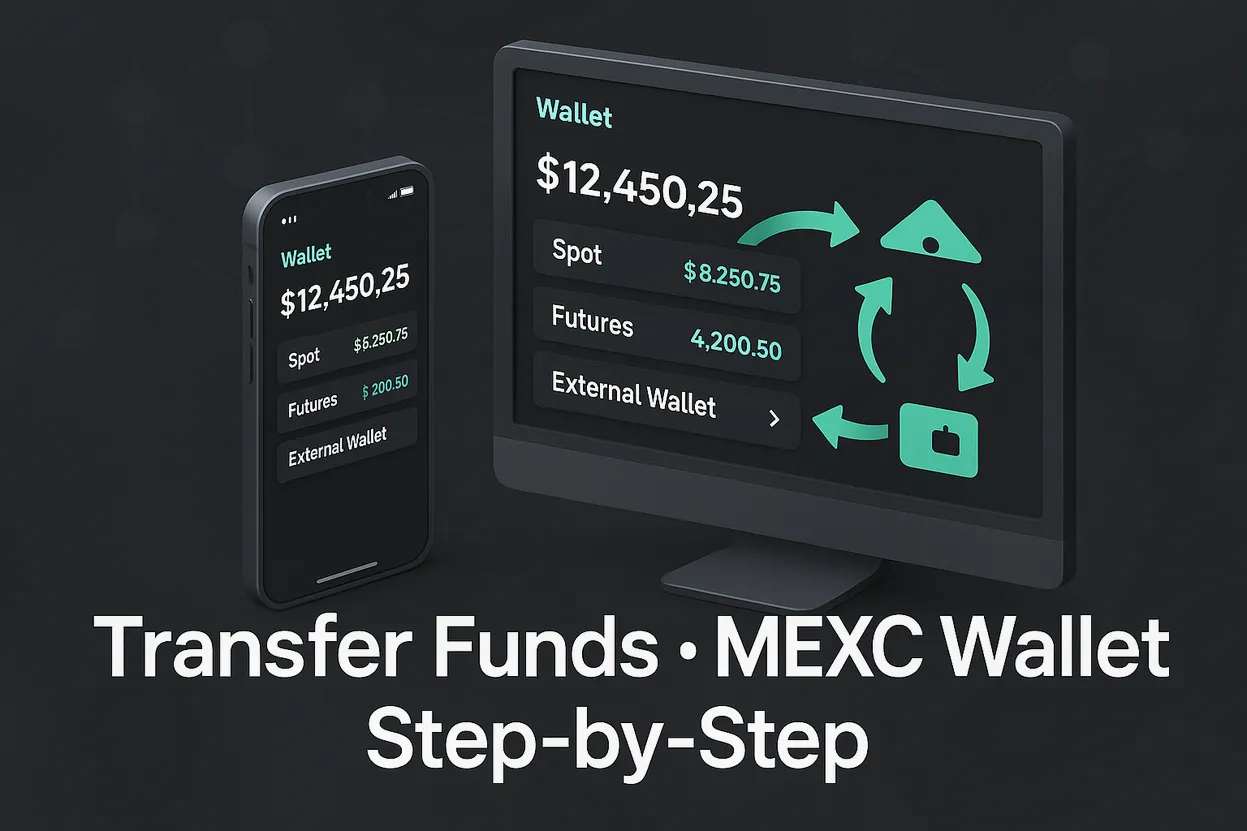
What “transfer” means inside MEXC
There are two major kinds of transfers you’ll use on MEXC:
- Internal wallet transfers (free, typically instant): Move funds between accounts within your MEXC wallet such as Spot, Futures, Margin, and Funding. No blockchain fees. Great for shifting funds to trade different products.
- On-chain transfers (network fees apply): Move assets between MEXC and external wallets/exchanges using the blockchain. This includes Deposits (external → MEXC) and Withdrawals (MEXC → external).
You’ll use internal transfers when reallocating capital between trading products. You’ll use on-chain transfers to get funds in/out of MEXC from hardware wallets, self-custody apps like MetaMask, or other exchanges.
Before you transfer: essential checks for safety and speed
-
Enable security first
- Turn on 2FA (Google Authenticator or similar) and email/SMS alerts.
- Set a withdrawal whitelist so funds can only be sent to approved addresses.
- Create an anti-phishing code within account settings to verify official emails.
-
Confirm the correct network for the coin you’re moving
- Example: USDT can exist on TRC20, ERC20, BEP20, and more. You must match the network on both sides of the transfer. Wrong network = loss of funds.
-
Check if a MEMO/tag is required
- Coins like XRP, XLM, EOS, and some exchange-based deposits require a MEMO, tag, or destination ID. If it’s required and missing, the funds may not arrive automatically.
-
Know minimums and fees
- Each token/network has its own minimum withdrawal amount and fee. Verify this on the Withdraw screen before initiating. Internal transfers are typically fee-free.
-
Test small, then scale
- For new addresses or networks, send a small test amount first. Confirm it arrives, then send the rest.
Internal transfers on MEXC (Spot, Futures, Margin, Funding)
Internal transfers are the fastest way to reallocate capital within your MEXC wallet without blockchain fees.
On web
- Log in to your MEXC account.
- Go to Wallet → Overview (or Wallet → Spot). Look for the “Transfer” option.
- Choose From and To accounts (e.g., Spot → Futures, or Funding → Spot).
- Select the coin (e.g., USDT) and enter the amount.
- Click Transfer. The move is usually instant.
In the app
- Open the MEXC app and sign in.
- Tap Wallet (bottom menu) → Transfer.
- Choose From and To, select the asset, and enter the amount.
- Confirm the transfer.
Notes
– Internal transfers are typically instant and free.
– If you use sub-accounts, you can transfer between main and sub-accounts from Wallet → Sub-accounts (permissions may be required).
Depositing crypto to MEXC (on-chain)
Use this when you want to send funds from an external wallet or another exchange into your MEXC account.
On web
- Navigate to Wallet → Deposit.
- Choose the coin you’re depositing (e.g., BTC, ETH, USDT).
- Select the appropriate network that matches your sending wallet (e.g., TRC20 for USDT if sending from a TRC20 address).
- Copy the deposit address. If a MEMO/tag is shown, copy that too.
- From your external wallet, paste the address (and MEMO if required), choose the same network, and send.
- Wait for network confirmations. You can track progress in Wallet → Deposit History.
In the app
- Tap Wallet → Deposit.
- Select the coin and the correct network.
- Copy address and MEMO (if provided), then initiate the send from your external wallet.
Important
– The address changes per network. Always re-check the network before sending.
– Some assets take longer to confirm (BTC can take longer than TRC20 USDT, for example).
Withdrawing crypto from MEXC to an external wallet (on-chain)
Use this to send assets from MEXC to self-custody wallets like Ledger/Trezor or software wallets like MetaMask.
On web
- Go to Wallet → Withdraw.
- Select your coin and choose the destination network.
- Paste the recipient address and include MEMO/tag if required by the destination.
- Enter the amount and review the fee and estimated arrival.
- If you use an address whitelist, pick a saved address or add a new one (follow security prompts).
- Confirm with 2FA. Track status in Wallet → Withdraw History.
In the app
- Tap Wallet → Withdraw.
- Choose the asset and network.
- Paste the address (and MEMO if required), set the amount, and confirm with 2FA.
Tips to optimize
– Compare networks. USDT-TRC20 often has lower fees than ERC20; choose what your destination supports.
– For large transfers, consider a small test first.
– Double-check chain support for your wallet (e.g., MetaMask default supports EVM networks; for non-EVM, you’ll need the right chain configuration or a compatible wallet).
Real-world scenarios you’ll likely use
Move USDT from Spot to Futures inside MEXC
- Wallet → Transfer → From Spot → To Futures.
- Select USDT, enter the amount, and confirm.
- Funds appear in your Futures balance almost instantly.
Transfer BTC from MEXC to your hardware wallet
- Wallet → Withdraw → BTC.
- Choose the appropriate network (e.g., BTC native). Paste your hardware wallet address.
- Verify fee, confirm 2FA, and track confirmations on-chain.
Receive ETH from MetaMask into MEXC
- Wallet → Deposit → ETH.
- Choose the same network as your MetaMask ETH (commonly Ethereum mainnet/ERC20 for ETH).
- Copy the address, send from MetaMask, and wait for confirmations.
Send USDT-TRC20 from MEXC to another exchange
- Wallet → Withdraw → USDT → Network: TRC20.
- Paste the recipient address from the other exchange’s TRC20 deposit page.
- Confirm fee and minimum, then send a small test before the full amount.
Common mistakes to avoid (and how to fix them)
-
Wrong network selected
- Symptom: Funds don’t arrive where expected.
- Prevention: Match the network on both sides every time.
- Possible fix: Contact support immediately with TXID, screenshots, and timestamps. Recovery is not guaranteed.
-
Missing MEMO/tag
- Symptom: Deposit credited late or not auto-credited.
- Fix: Open a support ticket and provide transaction details. Some assets require manual crediting if MEMO was omitted.
-
Sending to a contract-incompatible wallet
- Symptom: The receiving wallet doesn’t recognize the token or network.
- Fix: Add the token contract to your wallet (if EVM-compatible) or use a wallet that supports the network.
-
Minimum withdrawal not met
- Symptom: Error on submit.
- Fix: Adjust the amount to meet the network’s minimum.
-
Address copied incorrectly
- Prevention: Use the copy button and verify first and last 6 characters before sending.
Fee, speed, and reliability tips
- Internal transfers are typically instant and free.
- On-chain fees depend on network congestion and token type.
- USDT-TRC20: usually lower fees, faster confirmations.
- USDT-ERC20: higher gas fees during peak network use.
- BTC: confirmations vary with network traffic.
- Choose networks supported by your destination for faster settlement and lower costs.
- For high-value transfers, move during off-peak hours and consider a test transaction first.
Security best practices for MEXC transfers
- 2FA on everything: login, withdrawals, and API.
- Use withdrawal address whitelists and lock them with a cool-down period.
- Anti-phishing code in account settings to authenticate official emails.
- Do not reuse exchange passwords elsewhere; use a password manager.
- Beware of fake support and phishing links. Always navigate directly to the site/app.
Handy checklist before every on-chain transfer
- [ ] Does the network match on both sides?
- [ ] Is a MEMO/tag required and included?
- [ ] Does the amount meet the minimum after fees?
- [ ] Have you verified the first/last characters of the address?
- [ ] Is 2FA enabled and working?
- [ ] For a large amount, did you test with a small transfer first?
Quick answers to FAQs
-
Are internal MEXC transfers free?
- Yes, internal transfers within your MEXC wallet are typically fee-free and near-instant.
-
How long do deposits take?
- It depends on the network. TRC20 USDT is often quick; BTC and ERC20 tokens can take longer during high demand.
-
Can I cancel a crypto withdrawal after submission?
- Once it’s broadcast to the blockchain, it cannot be reversed. If it’s still pending and not broadcast, you may be able to cancel—check Withdraw History.
-
Where do I find my transaction ID (TXID)?
- In Withdraw History (for outgoing) or the sending wallet/transaction explorer (for incoming). This helps support trace your transfer.
Pro tips for cost-effective transfers
- Pick the right USDT network. TRC20 is often the budget-friendly choice if your destination supports it.
- Consolidate small withdrawals into a single transfer to save on fees.
- When moving between exchanges that support multiple networks, compare fees and confirmation speeds before sending.
- For frequent on-chain withdrawals, consider using whitelists and saved labels to reduce errors.
Get started with MEXC and claim your spot
New to MEXC? Use this referral to support the guide and potentially access promotional benefits: Create your MEXC account with code mexc-CRYPTONEWER. After onboarding, practice an internal transfer (Spot → Futures) to get familiar. Then try a small on-chain deposit from your self-custody wallet to build confidence.
Troubleshooting unusual cases
-
Deposit shows “completed” on the explorer but not in MEXC
- Allow for required confirmations. If it still doesn’t appear, open a ticket with the TXID, asset, network, and timestamp.
-
Withdrawal status “processing” for too long
- Network congestion or additional risk checks may apply. Verify address whitelist/2FA, then contact support if extended.
-
Network temporarily unavailable
- Maintenance happens. Try again later or select another supported network if the asset exists on multiple chains.
Glossary
- Address whitelist: A list of pre-approved addresses you can withdraw to.
- MEMO/Tag: An extra identifier required by some chains/exchanges to route the deposit.
- Network fee: The blockchain fee paid to validators/miners for processing your transaction.
- Internal transfer: Movement of funds within your MEXC accounts without using the blockchain.
- TXID: Transaction ID, the immutable on-chain reference of your transfer.
Quick start recap
- Internal transfers: Wallet → Transfer → choose accounts and asset → confirm.
- Deposit to MEXC: Wallet → Deposit → pick asset and network → send from your external wallet.
- Withdraw from MEXC: Wallet → Withdraw → select asset and network → paste address/MEMO → confirm with 2FA.
Save this guide and bookmark your most-used deposit addresses inside MEXC. When you’re ready, join with code mexc-CRYPTONEWER here: Sign up to MEXC.